A Post With Lots 'O Pictures
In case you were just sitting on the edge of your seat, wondering where I am in my fireplace revamp, I am here to assuage your anxiety. Right. Yes, I am sure you were just writhing in agony from the unknown.
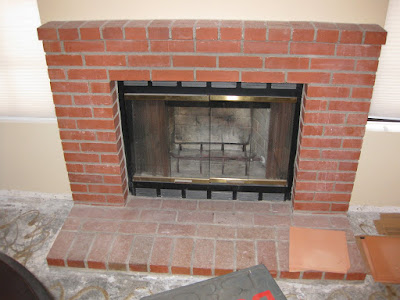
Well, I am here to tell you: it ain't done yet. It's a really fiddly update. Everything is taking forever and requires a patient hand. A reminder of what this bad boy looked like, pre-destruction.
 After I installed the stone veneer, notice the scratched up area near the stone courtesy of the brick mortar that was removed, and the drywall mess on the sides:

First step was to get me a can of black high heat paint. Spray paint was not really an option - it would be damn near impossible to tape off and cover all the stone and still reach all the nooks and crannies. So paint and little brushes (cheapo brush kit from the Depot) were the plan of attack.

I removed the doors and, holy living cripe, they were filthy. Gave 'em a good cleaning and two coats of that paint (before reading the instructions that said additional coats were not recommended. Oops. Whatever, looked like dog terd with only one coat).

I also replaced the old, partially broken, handles with rustic pulls from Lowes, $3.97 each. Better than a poke in the eye with a stick.

Then came patching up the drywall. I am not sure that was better than a poke in the eye with a stick. That part took 3 days, with all the coats and waiting to dry and such. After sanding:

As for the texture, again, the spray can orange peel stuff would have been hard to apply without spraying the stone and we already talked about taping off jaggedy edged stone. Good luck with that, because I'm not doing it. I still have half a 40 pound bucket of drywall mud left over from the kitchen reno so I watered it down in my mud pan:

Then took an old kitchen sponge and applied it randomly to the wall:


Hey, it's not a perfect match but it's close enough. I also caulked (with the clear, paintable variety) any gaps where I wasn't able to get the drywall mud into.
Then I got to painting (which, by the way, friggin' Glidden changed their formulations midway through the painting of this room, so this area was the old formulation and then I got a new can of the same color and it is just different enough that it's kinda noticeable. In the dining area, I basically have to repaint two walls so that it's not all splotchy. Meanwhile the Depot paint people were like "Glidden has said it will look the same". Right.).


And here is where I'm at today. Notice the dusty floor. Fabulous. We still have a mantle to create and stain (matching the floor), molding around the hearth to hide the flooring expansion gap, and baseboards. And also new blinds. It never ends.

Well, I am here to tell you: it ain't done yet. It's a really fiddly update. Everything is taking forever and requires a patient hand. A reminder of what this bad boy looked like, pre-destruction.
 After I installed the stone veneer, notice the scratched up area near the stone courtesy of the brick mortar that was removed, and the drywall mess on the sides:
First step was to get me a can of black high heat paint. Spray paint was not really an option - it would be damn near impossible to tape off and cover all the stone and still reach all the nooks and crannies. So paint and little brushes (cheapo brush kit from the Depot) were the plan of attack.

I removed the doors and, holy living cripe, they were filthy. Gave 'em a good cleaning and two coats of that paint (before reading the instructions that said additional coats were not recommended. Oops. Whatever, looked like dog terd with only one coat).

I also replaced the old, partially broken, handles with rustic pulls from Lowes, $3.97 each. Better than a poke in the eye with a stick.

Then came patching up the drywall. I am not sure that was better than a poke in the eye with a stick. That part took 3 days, with all the coats and waiting to dry and such. After sanding:

As for the texture, again, the spray can orange peel stuff would have been hard to apply without spraying the stone and we already talked about taping off jaggedy edged stone. Good luck with that, because I'm not doing it. I still have half a 40 pound bucket of drywall mud left over from the kitchen reno so I watered it down in my mud pan:

Then took an old kitchen sponge and applied it randomly to the wall:


Hey, it's not a perfect match but it's close enough. I also caulked (with the clear, paintable variety) any gaps where I wasn't able to get the drywall mud into.
Then I got to painting (which, by the way, friggin' Glidden changed their formulations midway through the painting of this room, so this area was the old formulation and then I got a new can of the same color and it is just different enough that it's kinda noticeable. In the dining area, I basically have to repaint two walls so that it's not all splotchy. Meanwhile the Depot paint people were like "Glidden has said it will look the same". Right.).


And here is where I'm at today. Notice the dusty floor. Fabulous. We still have a mantle to create and stain (matching the floor), molding around the hearth to hide the flooring expansion gap, and baseboards. And also new blinds. It never ends.


But it looks so good!!!
ReplyDeleteQuick thinking on the texture touchup.
And I hate paint touchups. It never ever matches good unless it is straight out of the can it came from (and even that is dicey).
And spray painting anything in a functioning house is a risk between cancerous odors and flammability. I am with you on the cheap brushes.
I am so jealous. I have the most butt ugly brick fireplace ever.
ReplyDeleteI think it looks great!!!!!!
ReplyDeleteIt looks like a ton of work, but totally worth it. Amazing transformation!
ReplyDelete